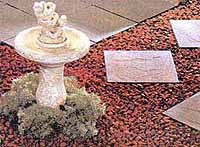
| Paver stones can be used to form a patio or stepping stones. |
When most people want to put hard surfaces in a yard they think of one thing.
Slab concrete.
But the fact is there is another way that concrete or concrete like products can be used for laying hard surfaces, the various kinds of blocks that are on the market today.
The problem is that most people have had bad experiences with using blocks as a surface or even as a retaining wall. They find that weed grow between the cracks or that the blocks move around, never seeming as secure as a heavy concrete slab. Some also say that they are hard to get even.
But, if laid properly, with the proper materials, block can actually have advantages over traditional cement.
For instance, for those who can’t make up their minds, block is the perfect material. Once put in, it can be removed or reconfigurated.
Block can also be installed by an absolute layman, unlike concrete which to get a good finish and proper set up needs someone who knows what they are doing.
Block also allows a person to put in a little at a time, whereas concrete, unless mixed at home, requires a certain amount delivered. Because of this the cost can also be spread out.
The number of uses for block in a yard is almost unlimited. Ideas for their use are only restricted by ones imagination.
| Interlocking blocks can be used without mortar to form retaining walls and flower rings. These bricks piled about five feet tall act as a retaining wall for a hill and a planter for decorative shrubs. |
Building raised planting beds and retaining walls are good do-it-yourself projects.
A lot of people use railroad ties or treated landscape timbers for this type of landscaping, but they need to be installed properly or rot problems could result.
For do-it-yourselfers, interlocking concrete blocks work well. There are a few different brands of them on the market today, but they all work on the same principles:
Probably the most important part of installing interlocking concrete blocks is to prepare the foundation for the wall properly.
Installers want to make sure that as they dig out the area, they don’t disturb the soil that they’re going to leave in place. This is called “skimming.”
As the foundation is dug out check to make sure that the base is level. The base should be low enough so that the first row will sink below ground level on the front. As a rule of thumb, the bottom row should be buried about 1″ for every 8″ of wall height above the ground.
For larger projects dig down about 6 inches below where the wall is to start, and then put in some good fill.
Compact the fill with a 4 x 4 or hand tamper. Again, make sure it’s level all along the wall.
For very large retaining walls on a large hillside, water drainage is usually a problem because it’ll flow down the hill and start eating away at the fill behind the retaining walls.
To eliminate this problem lay a moisture membrane behind the wall to catch the water, along with some drain tile to collect the water and to pull it away.
| These paver stones are being used as a base for a hot tub. They were installed by using sand as a base, which made them easy to level. Not that vegetation is also not growing through the stones because of a membrane that was placed under them. |
When installing the first row of block establish the shape of the whole project, to get it right.
It’s very important to check the blocks for level as they are set down. If minor adjustments need to be made, installers can use a little sand to raise the blocks. Don’t use loose dirt because it will settle over time.
Make sure that the outside edges touch one another.
As each row of a wall is finished, backfill should be placed behind, and in between the blocks. For a small wall just use dirt for the backfill. For bigger projects use smashed stone or river rock for the backfill.
Clean the tops of each row before moving on to upper rows of brick.
All of the rows will need to somehow lock to the row underneath it. Some interlocking blocks have a flange on the bottom in back to lock on to the lower row. Some have holes in the top and bottom for pins to lock the rows in place.
If a curved wall is desired and installers are using the flange-type of block, some of them will probably need to be knocked off with a hammer. In that kind of configuration the flanges will get in the way.
Most people set up a running bond pattern. This means that the joints between the blocks in the second row fall over the middle of the blocks in the first row.
After the second row of blocks is set, follow the same procedure: fill around the blocks, compact the fill, clean off the tops of the blocks, and put on the next course. And this repeats all the way up the wall.
For large walls, some professionals use what’s called a geogrid. This is a flexible plastic mesh that attaches to the back of the wall and anchors it to the hillside.
When using the pin-type of block, a special “cap” block can be utilized for the top row. That eliminates the holes from the pins in the top block. It is a good idea to put some construction adhesive under the cap blocks to hold them in place.
Another possible project is a tree ring. A tree ring is one of the simplest types of retaining walls. Just one row of blocks placed evenly behind and in front. If on a hill the blocks toward the hill will be buried. This is a nice area to plant a tree and a few flowers.
One of the most typical retaining wall projects is a terraced wall on a house with a hill off to the side of it. Often hills are too steep for any plantings, and it’s tough to mow grass in those areas. Terraced walls create level areas for flowers, shrubs and even sections of lawn.
| This cluttered path through some trees is highlighted by a number of different kinds of stones and bricks, some whole and some broken. Many people like to achieve a rustic look by using pavers in various conditions. |
Probably the most typical garden block that is seen in yards is the paver stone. It comes in various colors, configurations and sizes. Typically people like to use these in areas where they don’t want to put concrete or in places where they may want to change the layout of the design. These blocks are also good for single placement stepping stones. Mixing up blocks can make for a rustic look and even broken stones, which inevitably happen when stones are being shipped can be used in some areas for effect.
But for many people, laying these stones is a mystery. They often can’t get them even, or they have encounter settling after the blocks are installed.
Another problem is weeds and grass. Some stones are put down so that grass will grow around them and it can be mowed. But an installation that is put in with grass growing through it unintentionally is obvious.
The first thing to remember about pavers of any kind is that they will allow vegetation to grow through them if there is not some kind of membrane that keeps the weeds out placed under them. Weeds will find the cracks no matter how tightly the blocks are placed together. So unless a homeowner wants to continually spray a membrane is a must.
Second is leveling. Many people try to install pavers by just using the available soil. But the problem with using soil is that first it is hard to get level and secondly it always settles, which creates problems particularly when pavers are laid in a configuration.
The best way to get paver even and level is to use sand to put under them before they are laid. Typical sand pile sand will work and it can be leveled out and compressed before the stones are laid. In fact as one is laying the stones sand can be put under them and the stones can be used as the compressor.
Leveling should be done either by using a large level that goes across the entire expanse of the patio or walk or by using a long straight edge (such as a straight, unwarped 2X4) with a smaller level placed on it. A well places string line can also be used.
Sand is not generally necessary for single blocks, but the installer must be care to be sure the stone is set solidly so it doesn’t wobble when someone steps on it. Otherwise injuries can result.
Most of the stones mentioned in this article can be purchased at competitive prices from local dealers in the Carbon County area.
It doesn’t take someone with a great deal of skill to put in these installations. All can be done with some hard work and patience by almost anyone who has the desire to make their yard a garden place.